Category Archives: Children’s Toys

Knitted Chickens and a Rooster

Many years ago I learnt to make knitted chickens during my Waldorf/Steiner teacher training. This is a quick and easy craft idea that can be used as a last-minute gift or an addition for the nature table this time of year. It’s also really great for using up your odds-and-ends yarn ends stash (I know, I just can’t bring myself to throw them out either!)

IMG_3555

The basic pattern is just a knitted square using garter stitch. This project is also perfect for a beginning knitter and does not really require counting or measuring.

I suggest starting with a smaller square – I often cast on 10-20 stitches using size 4-5 needles and corresponding wool in a ‘chicken’ colour. I knit until the piece looks like a square (you can fold the square in half diagonally to get more accuracy, matching length and width) and then cast off. Keep the yarn end long to stitch the chicken up.

I fold the complete square diagonally to make a triangle and use the left over yarn end to stitch up one side to the ‘right angle’ point of the triangle, and then a little more on the next seam. I leave a space through which to stuff the chicken, making sure to get stuffing evenly (not too full) to the ends of the triangle. I then sew the rest of the seam up.

If there is still a yarn end long enough, I guide the needle back through the body to the ‘right angle’ point. I secure it with a knot at that point and then bring the thread through the stuffed body out the back and back down again to the secured point. I secure the yarn again and this creates a dip in the back. I then weave the yarn in and cut it.

IMG_3558

To make the beak and other wobbly bits (they have a proper name right?) I use a crochet hook and another colour of yarn.

To be honest, I’m not a crochet expert, so explanations of my haphazard approach are rather futile – I just crochet until it looks about right. Maybe you are able to glean something from these photos? Sorry if this doesn’t really help…

And just to show what you can do with some embellishments and different coloured yarn, I made a rooster as well this year!

IMG_3556

As a basic guide with the rooster, I gradually changed from grey to green on one corner of a larger knitted square. Once I’d sewn it together (same as the chicken) I crocheted a series of chain loops at the tail end and added a few more flat chains where the wings are for extra colour.

I also found this blog post with more detail and a slightly different approach.

This really is a great last-minute make and a stash-buster. Enjoy making!

Felt Butterflies

Hello Dear Readers,

It really has been years since I last posted and I’ve been feeling the blogging itch recently. I am determined to begin my sharing again!

I had been super busy working at my school in Berlin and so have not had the space to share my creations of the last years; there have been so many creations, so I may from time to time introduce a previous project to you.

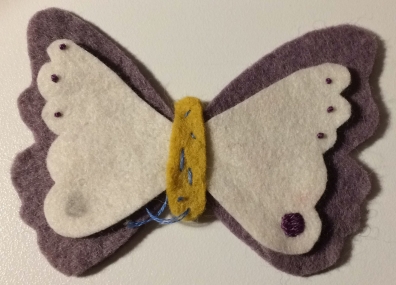
Today I would like to share a spring/Easter project I completed just yesterday: a felt, embroidered butterfly. I saw something similar in a children’s nature-toys catalog and had to try make one. Miss K also made one herself! (She can now confidently thread her own needle at 4 years old, which makes my hands more useful for my own projects.)

If you would like to make one, I have included instructions and a pattern below. Happy sewing!

IMG_3548

You will need:

– coloured felt sheets

– coloured thread

– a needle

– pattern (printed and cut out)

Felt Butterfly Pattern

Instructions:

1. Once you have cut out the pieces of felt in the colours you have chosen (4 pieces: 1x big wings, 1x small wings, 2x body) place pieces together and baste-stitch the body together.

IMG_3544

Haphazard blue basting-stitch on yellow body-part.

2. Blanket stitch around the body (you may need to do this on each side respectively around the wing-area).

3. Embroider the wings as desired. I used detached chain stitch to make the antennae as well.

Coiled basket children’s toys

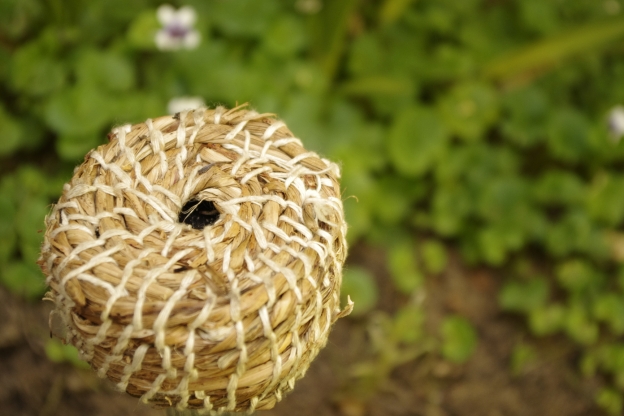
I was gardening and noticed that there is all this long, dried, leaf material just looking messy on the ground. It is flexible even though it is dry and so I figured it would be perfect to make into a basket. That was a little ambitious as there wasn’t enough for a large, adult basket, so I decided to make something for Miss K instead.

Basket making children's toys

Basket making children’s toys

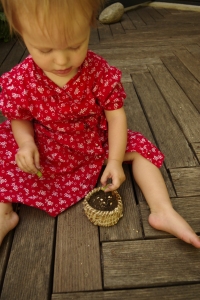
In the beginning we were going to plant some succulents in there, but then she preferred to rip those up into pieces. The vessel quickly rose to prime place in her private outdoor kitchen.

Basket making children's toys

Basket making children’s toys

These vessels are quite quick and easy to make. You can use many things to decorate  them – feathers, shells, flowers, coloured thread, anything really. I just kept these ones quite plain.

Coil basket making - in Miss K's kitchen

Coil basket making – in Miss K’s kitchen

Making a basket out of found or unwanted material is very satisfying for me. It fits with what my friend once called my ‘wartime mentality’. Make do and mend, waste not want not, all of that jazz. As I couldn’t find any tutorials or how to-s online that I liked, I decided to make my own. This is my first video tutorial and I hope that it is helpful for those of you wanting to try this craft!

A toddler’s perfect first paint

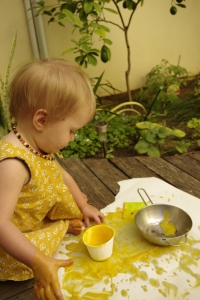
I thought it was time for Miss K to have her first painting experience. I planned only to give her one colour and I had to be able to handle her antics while cooking our dinner and dyeing silk. That means that it had to be ‘edible’ (though rather unlikely she would take to it with her current fussiness), fairly easy to clean up and quick to make


Miss K's first painting - eco paint

Miss K’s first painting – eco paint

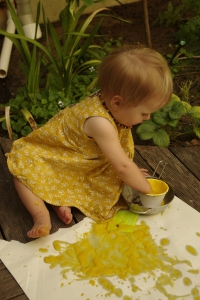
I actually tried at first to use the coloured water strained from the blueberries I was using for the silk dyeing, but the colour was much too weak, so I had to go for reinforcement. As a second idea, I was going to use turmeric. As you can see, she was wearing a yellow dress, so stains wouldn’t be too much of a problem… except for her hands (how would I explain that one to my fantastically clean husband?). Cut a long story short, I found yellow food dye hiding in my spices drawer.

Toddler's first paint - non-toxic and easy to make

Toddler’s first paint – non-toxic and easy to make

I am willing to admit that I totally compromised on my usual crunchiness. This mystery food-colouring yellow was easy, quick and seemed like the safest option. I failed as organic-eco-super-mum, right? Pfft. Anyways. Jolly Jumper all the way, I say.

3 ingredient toddler paint

3 ingredient toddler paint

So the paint is easy. But you have to do it in the right order otherwise you’ll get something lumpy and interesting that is decidedly not paint.

Ingredients:

Cornflour
Water
Something to colour your paint


What to do:

1. boil your kettle while you…
2. Mix together 4 tablespoons of cornflour and enough water to cover it. You should be able to stir this mixture easily. Add a little more water if necessary.
3. Add your colour and stir through
4. Stir in boiled, steaming hot water and constantly stir until it is thick. Add more hot water if you want the consistency to be thinner.
5. Let it cool down so it is safe for little hands and then use.

Toddler's first paint - DIY

Toddler’s first paint – DIY

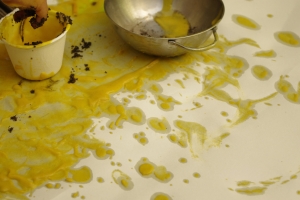
In the end Miss K found new paint colours in the earth around her.

Miss K's first painting - eco paint

Miss K’s first painting – eco paint DIY

It was a very quick activity. I think it will be a longer one as she gets older, but she had loads of fun all the same. I still have in the back of my mind that I will make this paint with plant colours. I’ll post our exploits of that if it works out.